Goal: Charge customers $12/year to publish their page.
What we're doing
Right now, anyone can save their page — but nobody can publish it yet. In this module, we wire up the Publish button so that when someone clicks it, they pay $12/year and their page goes live.
This is how you make money. One payment, one year of a live page.
What is Stripe?
Stripe handles payments. Credit cards, security, receipts, fraud detection — all of it. You never see or touch anyone's card details. You just tell Stripe "charge this person $12" and Stripe does the rest.
Sandbox vs Live
Stripe has two modes:
Sandbox — Fake money. Nothing real happens. You can create products, set up subscriptions, and test the entire payment flow using a fake card number. Every Stripe feature works in the sandbox — the only difference is no real money moves.
Live mode — Real money. Real customers. Requires you to activate your account with real business information.
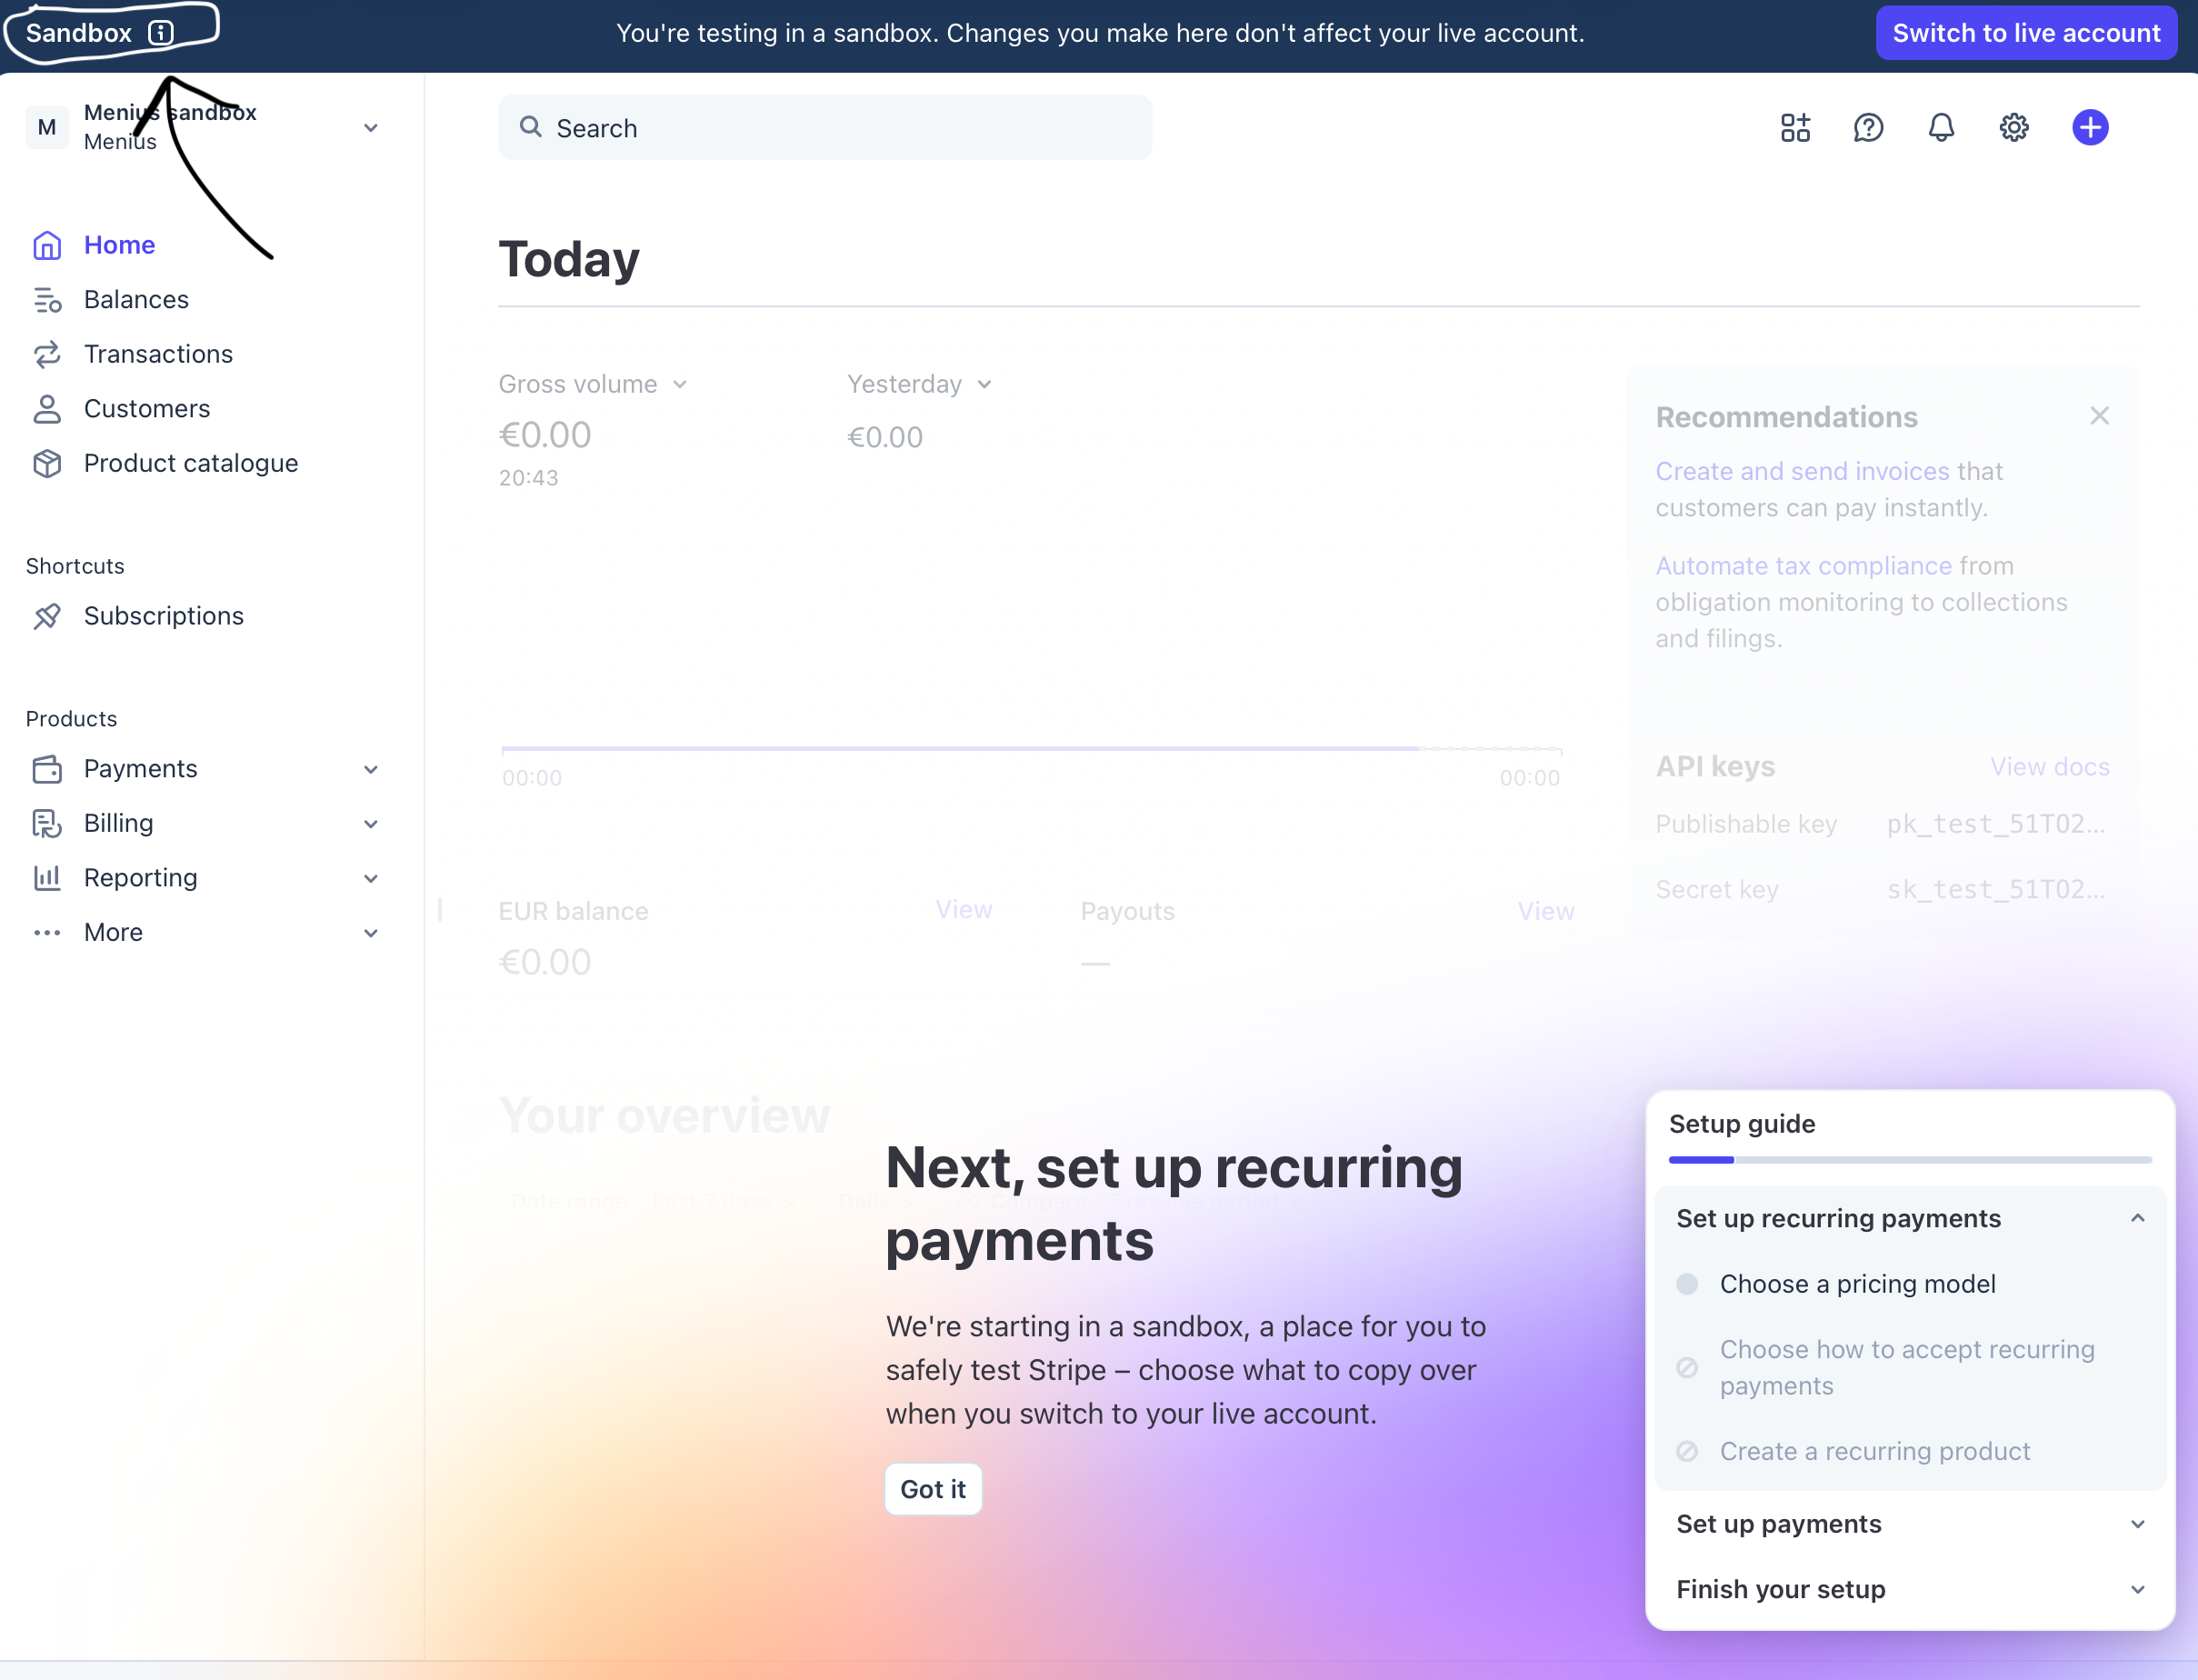
We're building everything in the Sandbox. When you create a Stripe account, you land in the sandbox immediately. We'll switch to Live mode in the Go Live module.
Step 1: Create a Stripe account
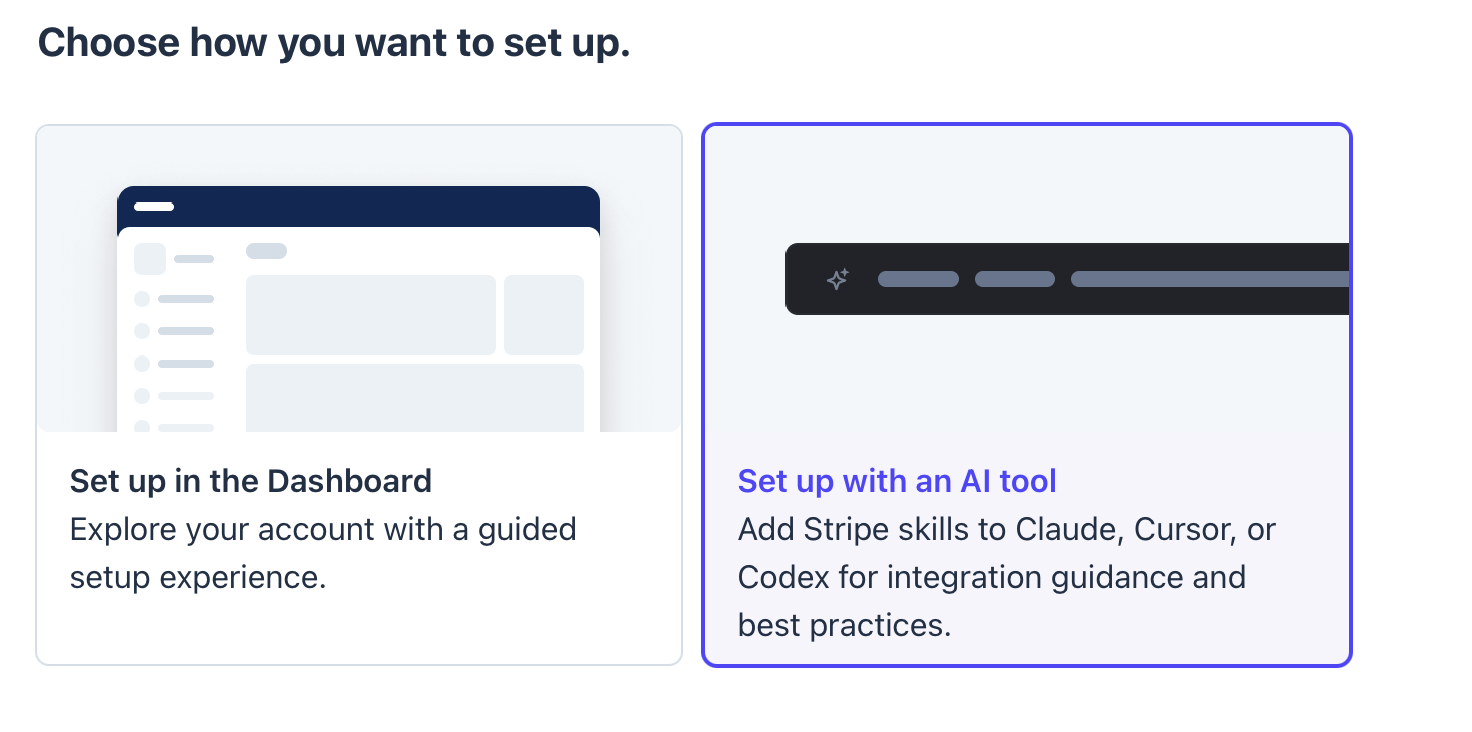
When you reach this screen, choose Set up with an AI tool — not "Set up in the dashboard".
Step 2: Connect the Agent to Stripe
Just like we did with Supabase, we're giving the Agent a direct connection to your Stripe account so it can set everything up for you.
Verification
1. Ask the Agent: "Is my Stripe MCP connection fully set up?" It should confirm without an error.
2. Go back to Stripe — keep going until you see this dashboard:
Step 3: Set up payments
One prompt. The Agent will install Stripe, create the product, wire up the Publish button, set up webhooks, set up the local testing tunnel, and handle all the security — everything through MCP.
Read my blueprint.txt. You have both a Stripe MCP and a Supabase MCP connected — use both to do everything automatically. Do not ask me to run SQL, copy-paste anything, or do manual steps in any dashboard. Make every change yourself through MCP.
Before writing any code: Confirm via MCP that both your Stripe MCP and Supabase MCP connections are working. If either fails, stop and tell me in plain English what's wrong before continuing.
What to build:
When a customer clicks Publish, they should be taken to a Stripe Checkout page where they pay $12/year (annual subscription). If the payment succeeds, their page goes live immediately at their public URL. If the payment fails or they cancel, nothing happens — their page stays in draft.
Use Stripe MCP to create the subscription product and price. Use Supabase MCP to make any required database changes (new columns, new tables, updated RLS policies — all of it).
Subscription lifecycle:
When payment succeeds, the page goes live
If a customer cancels their subscription, the page stays live until the end of their current billing period, then becomes a draft again
Renewals are automatic — Stripe handles this. If a renewal fails, the page becomes a draft
Store the Stripe customer ID and subscription ID on the customer's profile
Security — this is critical:
The publish status must ONLY be set by a server-side webhook that verifies the payment with Stripe — never from the browser. A customer should not be able to bypass payment by manipulating the frontend.
Verify the webhook signature on every request so nobody can fake a payment event
The public page at /page/[username] must check the database on every load — no caching tricks to bypass it
The webhook handler must use the Supabase service role key (not the public anon key) when updating the database — the anon key is blocked by row-level security and the update will silently fail
Webhook setup:
Create a webhook endpoint in the app at /api/webhook
Listen for all the events needed to handle the full subscription lifecycle (payment success, cancellation, renewal failure, etc.)
The production webhook (for Vercel) gets registered in Step 5 — don't do that here
Local webhook testing — do this before declaring done:
Stripe's servers cannot reach localhost, so webhook events won't fire during local testing unless you set up a tunnel. Do all of this yourself without asking me to run any commands:
Install the Stripe CLI (via Homebrew: brew install stripe/stripe-tools/stripe)
Run stripe listen --forward-to localhost:3000/api/webhook as a background process
Capture the webhook signing secret it prints (starts with whsec_) and write it to .env.local as STRIPE_WEBHOOK_SECRET
Restart the dev server so it picks up the new secret
Do not tell me you're done until the tunnel is running and the secret is saved
Username — critical:
Never write or modify the username column in checkout or webhook code. Read it from the existing profile row in Supabase when you need it, but never overwrite it. Do not use any fallback value — if the username is missing, throw an error rather than substituting a placeholder.
After payment:
Redirect back to the dashboard with a success banner: "Your page is now live at [domain]/page/[username]"
Status badge changes from "Draft" to "Live"
Publish button changes to "Update Page" (updates instantly, no new payment needed)
If they haven't paid:
Publish button takes them to Stripe Checkout
Their page stays in draft — visiting their public URL shows "This page isn't live yet"
Before telling me you're done: Verify the app compiles with no build errors and no missing imports. Fix any errors you find before finishing.
Do everything end-to-end without stopping to ask me questions or give me instructions. When you're fully done, tell me: (1) what you built, (2) that the tunnel is running and ready, and (3) walk me through how to test. I'm non-technical and copy-pasted this from a guide — please keep all explanations in plain English.
AI PromptSet up Stripe payments — Put this in your IDE
Read my blueprint.txt. You have both a Stripe MCP and a Supabase MCP connected — use both to do ...
Click to expand
Step 4: Test the payment flow
Verification
You click pay with the test card, and your page goes live — just like a real customer would experience.
How cancellations work
If a customer cancels their subscription, their page stays live until the end of the billing period they already paid for. For example, if they paid on January 1st and cancel on March 15th, their page stays live until January 1st of the next year. After that, it becomes a draft again. Stripe handles this automatically — you don't need to do anything.
Step 5: Push to Vercel
Save all my work to GitHub. Stage everything, commit it with a clear message about adding Stripe payments, and push it.
Then use Stripe MCP to register a production webhook endpoint pointing at my live Vercel URL (https://your-vercel-url.vercel.app/api/webhook). Get the signing secret for that endpoint from MCP and tell me exactly what to add to Vercel's environment variables — STRIPE_SECRET_KEY, STRIPE_PRICE_ID, and the new STRIPE_WEBHOOK_SECRET for production.
I'm non-technical and copy-pasted this from a guide — please keep all explanations in plain English.
AI PromptPush to GitHub and set up production webhook — Put this in your IDE
Save all my work to GitHub. Stage everything, commit it with a clear message about adding Stripe pay...
Click to expand
Warning
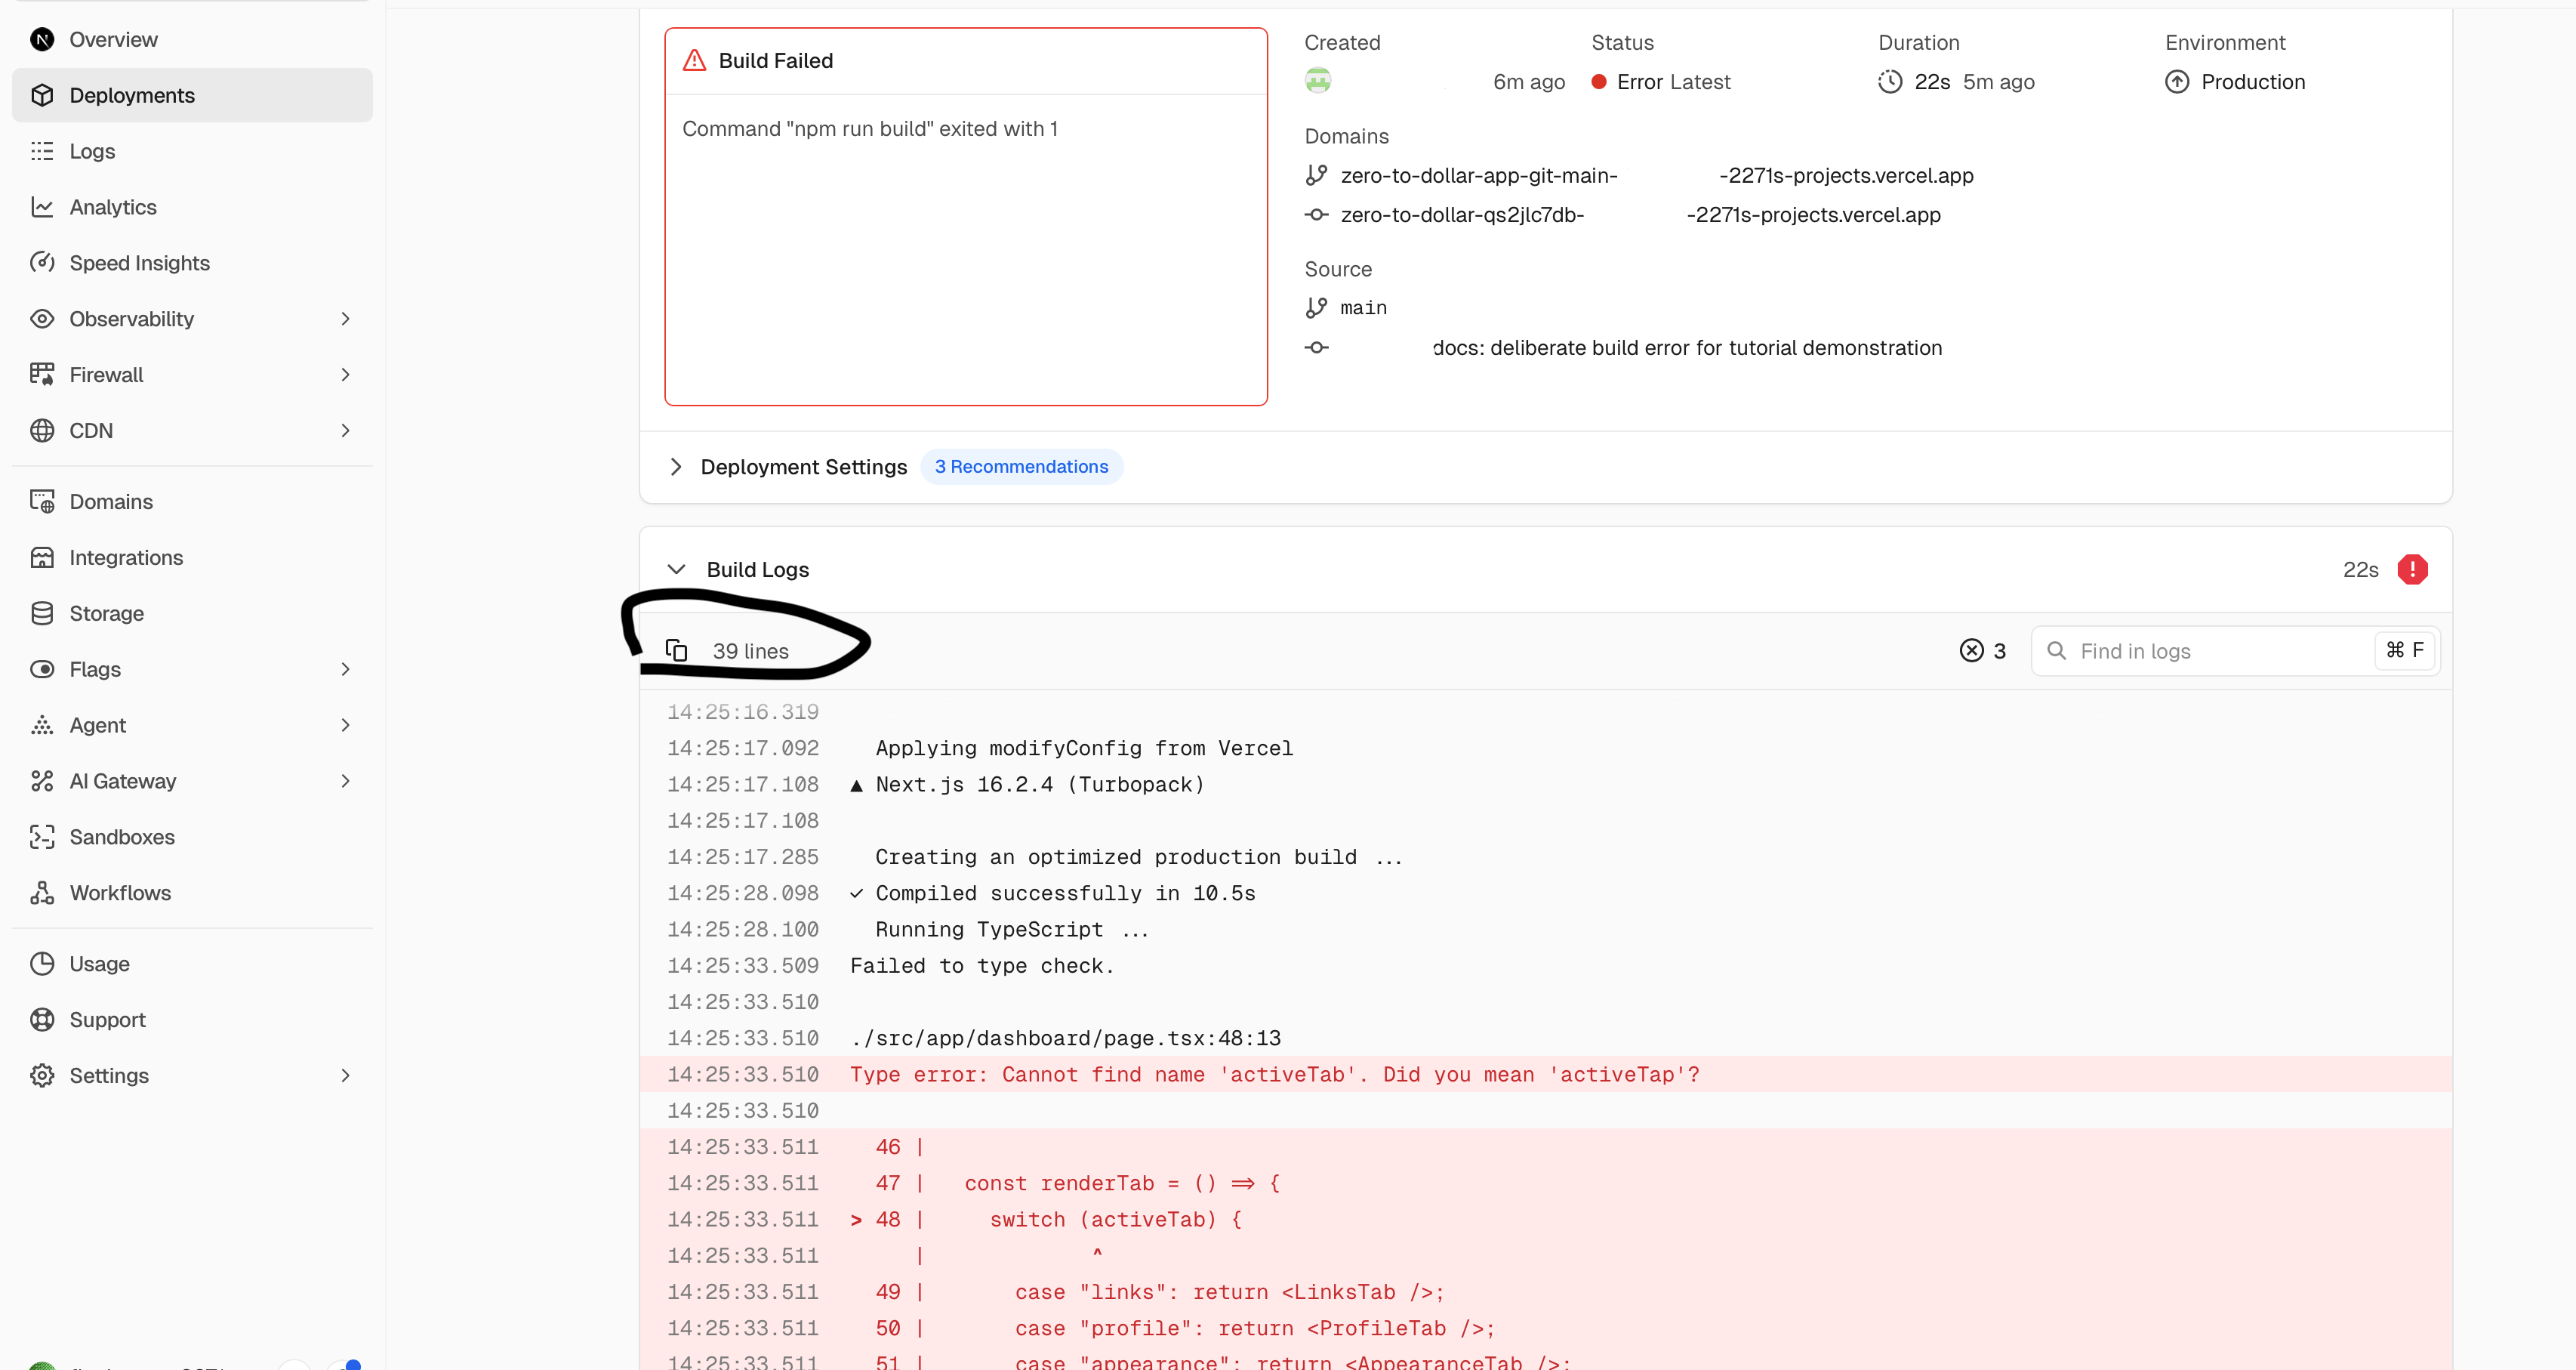
If you see a failed deployment — go to vercel.com, open your project, and click the Deployments tab. You'll see the failed deployment listed there:
Click on the failed deployment to see the error message, then copy it:
Paste it into the Agent and it will fix it.
Verification
The payment flow works on your live Vercel site in the sandbox. Customers can "pay" with the test card and their page goes live.